Adding a settings page
This page contains some instructions that are different if you're using CloudPebble or if you're using the SDK locally on your computer.
Select whether you're using CloudPebble or the SDK below to show the relevant instructions!
 Showing instructions for CloudPebble. Not using CloudPebble?
 Showing instructions for the SDK. Using CloudPebble?
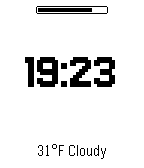
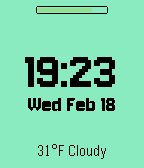
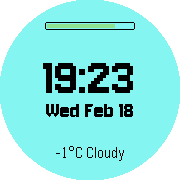
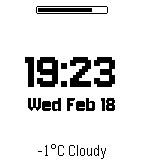
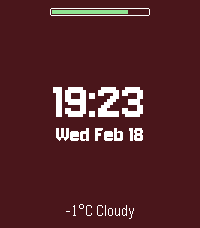
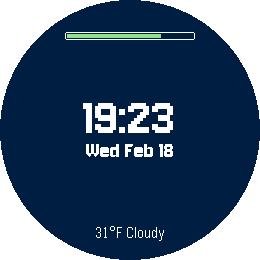
The finishing touch for any great watchface is letting users make it their own. In this final part we will add a configuration page using Clay for Pebble, which generates a settings UI on the phone from a simple JSON definition. Users will be able to pick colors, choose temperature units, and toggle the date display.
Here is an example of a customized watchface:
aplite
basalt
chalk
diorite
emery
gabbro
This section continues from Part 5.
Installing Clay
In CloudPebble, go to the Packages section in the left sidebar and add
@rebble/clay.
Clay is available as a Pebble Package. Install it from your project directory:
$ pebble package install @rebble/clay
This adds @rebble/clay to the dependencies in package.json.
Enabling Configuration
In CloudPebble, go to Settings and add configurable to the
Capabilities list so the gear icon appears next to your watchface in the
phone app.
For the gear icon to appear next to your watchface in the phone app, add
configurable to the capabilities array in package.json:
"capabilities": [
  "location",
  "configurable"
]
Defining Message Keys
In CloudPebble, go to Settings and add the following message keys in the
PebbleKit JS Message Keys section: BackgroundColor, TextColor,
TemperatureUnit, and ShowDate.
We need message keys for each setting. Add these to the messageKeys array,
alongside the existing weather keys:
"messageKeys": [
  "TEMPERATURE",
  "CONDITIONS",
  "REQUEST_WEATHER",
  "BackgroundColor",
  "TextColor",
  "TemperatureUnit",
  "ShowDate"
]
These become MESSAGE_KEY_BackgroundColor, MESSAGE_KEY_TextColor, etc. in C.
Creating the Clay Configuration
Click Add New next to Source Files in the left sidebar, select
JavaScript file, and name it config.js. Clay uses a simple JSON array of
sections and fields:
Create src/pkjs/config.js with the configuration definition. Clay uses a
simple JSON array of sections and fields:
module.exports = [
  {
    "type": "heading",
    "defaultValue": "Watchface Settings"
  },
  {
    "type": "text",
    "defaultValue": "Customize your watchface appearance and preferences."
  },
  {
    "type": "section",
    "items": [
      {
        "type": "heading",
        "defaultValue": "Colors"
      },
      {
        "type": "color",
        "messageKey": "BackgroundColor",
        "defaultValue": "0x000000",
        "label": "Background Color"
      },
      {
        "type": "color",
        "messageKey": "TextColor",
        "defaultValue": "0xFFFFFF",
        "label": "Text Color"
      }
    ]
  },
  {
    "type": "section",
    "items": [
      {
        "type": "heading",
        "defaultValue": "Preferences"
      },
      {
        "type": "toggle",
        "messageKey": "TemperatureUnit",
        "label": "Use Fahrenheit",
        "defaultValue": false
      },
      {
        "type": "toggle",
        "messageKey": "ShowDate",
        "label": "Show Date",
        "defaultValue": true
      }
    ]
  },
  {
    "type": "submit",
    "defaultValue": "Save Settings"
  }
];
Each messageKey matches a key in package.json. The color type provides
a color picker, toggle gives a switch.
Initializing Clay in JavaScript
Add three lines at the top of src/pkjs/index.js, before any other code:
var Clay = require('@rebble/clay');
var clayConfig = require('./config');
var clay = new Clay(clayConfig);
Clay automatically handles the showConfiguration and webviewClosed events.
Your existing weather code works alongside Clay without changes.
Persisting Settings on the Watch
On the C side, define a struct to hold all settings and use persistent storage to save them across app restarts.
At the top of the file:
#define SETTINGS_KEY 1

typedef struct ClaySettings {
  GColor BackgroundColor;
  GColor TextColor;
  bool TemperatureUnit; // false = Celsius, true = Fahrenheit
  bool ShowDate;
} ClaySettings;

static ClaySettings settings;
Add helper functions for defaults, save, and load:
static void prv_default_settings() {
  settings.BackgroundColor = GColorBlack;
  settings.TextColor = GColorWhite;
  settings.TemperatureUnit = false;
  settings.ShowDate = true;
}

static void prv_save_settings() {
  persist_write_data(SETTINGS_KEY, &settings, sizeof(settings));
}

static void prv_load_settings() {
  prv_default_settings();
  persist_read_data(SETTINGS_KEY, &settings, sizeof(settings));
}
prv_load_settings() sets defaults first, then overwrites with any saved data.
This ensures new fields always have valid defaults.
Call prv_load_settings() at the start of init(), before creating the window:
static void init() {
  prv_load_settings();
  // ... rest of init
}
Applying Settings to the UI
Create a function that updates all visual elements based on current settings:
static void prv_update_display() {
  window_set_background_color(s_main_window, settings.BackgroundColor);

  text_layer_set_text_color(s_time_layer, settings.TextColor);
  text_layer_set_text_color(s_date_layer, settings.TextColor);
  text_layer_set_text_color(s_weather_layer, settings.TextColor);

  // Show/hide date based on setting
  layer_set_hidden(text_layer_get_layer(s_date_layer), !settings.ShowDate);

  layer_mark_dirty(s_battery_layer);
}
Call this at the end of main_window_load() to apply saved settings on startup.
We also need to update the battery drawing. The color-coded levels from Part 3
stay the same on color platforms, but we use settings.TextColor for the border
and as the monochrome fallback so the bar respects the user's color choice:
static void battery_update_proc(Layer *layer, GContext *ctx) {
  GRect bounds = layer_get_bounds(layer);

  // Find the width of the bar (inside the border)
  int bar_width = ((s_battery_level * (bounds.size.w - 4)) / 100);

  // Draw the border using the text color
  graphics_context_set_stroke_color(ctx, settings.TextColor);
  graphics_draw_round_rect(ctx, bounds, 2);

  // Choose color based on battery level
  GColor bar_color;
  if (s_battery_level <= 20) {
    bar_color = PBL_IF_COLOR_ELSE(GColorRed, settings.TextColor);
  } else if (s_battery_level <= 40) {
    bar_color = PBL_IF_COLOR_ELSE(GColorChromeYellow, settings.TextColor);
  } else {
    bar_color = PBL_IF_COLOR_ELSE(GColorGreen, settings.TextColor);
  }

  // Draw the filled bar inside the border
  graphics_context_set_fill_color(ctx, bar_color);
  graphics_fill_rect(ctx, GRect(2, 2, bar_width, bounds.size.h - 4), 1, GCornerNone);
}
Handling Settings in the Inbox
The tricky part: our inbox_received_callback now handles two types of
messages - weather data AND configuration changes. We differentiate by checking
which keys are present:
static void inbox_received_callback(DictionaryIterator *iterator, void *context) {
  // Check for weather data
  Tuple *temp_tuple = dict_find(iterator, MESSAGE_KEY_TEMPERATURE);
  Tuple *conditions_tuple = dict_find(iterator, MESSAGE_KEY_CONDITIONS);

  if (temp_tuple && conditions_tuple) {
    static char temperature_buffer[8];
    static char conditions_buffer[32];
    static char weather_layer_buffer[42];

    int temp_value = (int)temp_tuple->value->int32;

    // Convert to Fahrenheit if setting is enabled
    if (settings.TemperatureUnit) {
      temp_value = (temp_value * 9 / 5) + 32;
      snprintf(temperature_buffer, sizeof(temperature_buffer), "%d°F", temp_value);
    } else {
      snprintf(temperature_buffer, sizeof(temperature_buffer), "%d°C", temp_value);
    }

    snprintf(conditions_buffer, sizeof(conditions_buffer), "%s", conditions_tuple->value->cstring);
    snprintf(weather_layer_buffer, sizeof(weather_layer_buffer), "%s %s", temperature_buffer, conditions_buffer);
    text_layer_set_text(s_weather_layer, weather_layer_buffer);
  }

  // Check for Clay settings
  Tuple *bg_color_t = dict_find(iterator, MESSAGE_KEY_BackgroundColor);
  if (bg_color_t) {
    settings.BackgroundColor = GColorFromHEX(bg_color_t->value->int32);
  }

  Tuple *text_color_t = dict_find(iterator, MESSAGE_KEY_TextColor);
  if (text_color_t) {
    settings.TextColor = GColorFromHEX(text_color_t->value->int32);
  }

  Tuple *temp_unit_t = dict_find(iterator, MESSAGE_KEY_TemperatureUnit);
  if (temp_unit_t) {
    settings.TemperatureUnit = temp_unit_t->value->int32 == 1;
  }

  Tuple *show_date_t = dict_find(iterator, MESSAGE_KEY_ShowDate);
  if (show_date_t) {
    settings.ShowDate = show_date_t->value->int32 == 1;
  }

  // Save and apply if any settings were changed
  if (bg_color_t || text_color_t || temp_unit_t || show_date_t) {
    prv_save_settings();
    prv_update_display();

    // Refetch weather if the temperature unit changed so the display updates
    if (temp_unit_t) {
      DictionaryIterator *iter;
      app_message_outbox_begin(&iter);
      dict_write_uint8(iter, MESSAGE_KEY_REQUEST_WEATHER, 1);
      app_message_outbox_send();
    }
  }
}
Weather messages contain TEMPERATURE and CONDITIONS keys. Clay messages
contain BackgroundColor, TextColor, etc. Both can be handled independently
in the same callback.
Notice that when the temperature unit changes we immediately request a weather refresh. Without this, the display would keep showing the old unit until the next scheduled 30-minute update.
Also increase the AppMessage buffer sizes in init() to accommodate the
larger Clay messages:
const int inbox_size = 256;
const int outbox_size = 256;
Trying It Out
Click the play button to compile and install, then tap the gear icon in the emulator to open the settings page.
Build and install your watchface, then use pebble emu-app-config to open
the settings page in your browser:
$ pebble build && pebble install --emulator emery
$ pebble emu-app-config
Try changing the background color, text color, and toggling the date and temperature unit - you should see the watchface update immediately.
Updating Timeline Peek for Settings
Since our Timeline Peek handlers reposition layers rather than hiding them, no
changes are needed there for Clay settings. The ShowDate toggle is handled
entirely in prv_update_display() - when the date is hidden, it simply stays
hidden regardless of the obstruction state.
Conclusion
Congratulations! You have built a complete, feature-rich Pebble watchface. Here is everything it includes:
- Digital time display with a custom font.
- Date display that can be toggled on/off.
- Live weather from Open-Meteo (no API key needed).
- Battery meter drawn with custom graphics.
- Bluetooth disconnect icon and vibration alert.
- Timeline Peek support with smooth animations.
- Clay configuration for colors and preferences.
- Persistent settings that survive app restarts.
In this final part we learned how to:
- Install and configure Clay for Pebble.
- Define a settings page with color pickers and toggles.
- Persist settings on the watch with
persist_write_data(). - Handle mixed message types (weather + config) in a single inbox callback.
- Apply settings dynamically to all UI elements.
Check your code against the source for this part. Now it is time to publish your watchface and share it with the world!