Adding Weather with Open-Meteo
This page contains some instructions that are different if you're using CloudPebble or if you're using the SDK locally on your computer.
Select whether you're using CloudPebble or the SDK below to show the relevant instructions!
 Showing instructions for CloudPebble. Not using CloudPebble?
 Showing instructions for the SDK. Using CloudPebble?
Up until now, everything in our watchface has been running entirely on the watch. In this part we take a big step: communicating with the phone to fetch live weather data from the web.
We will use PebbleKit JS to run
JavaScript on the connected phone, fetch weather data from the free
Open-Meteo API (no API key needed!), and send it to
the watch using AppMessage.
This section continues from Part 3.
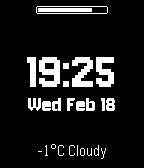
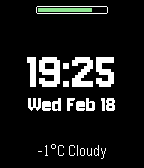
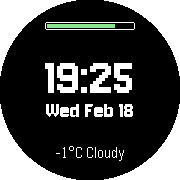
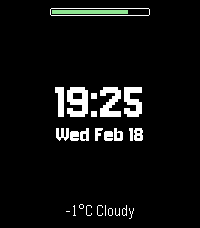
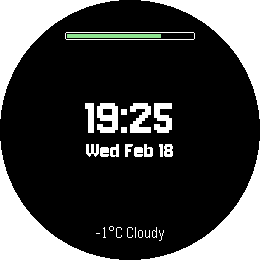
By the end, our watchface will show the current temperature and weather conditions:
aplite
basalt
chalk
diorite
emery
gabbro

How PebbleKit JS Works
Pebble watches cannot access the internet directly. Instead, they communicate
with a JavaScript environment called PebbleKit JS (PKJS) that runs on the
connected phone. Your JS code can make HTTP requests, access GPS, and send data
back to the watch using AppMessage.
┌─────────────┐          ┌──────────────────┐          ┌──────────────┐
│   Watch     │          │  Phone (PKJS)    │          │   Internet   │
│             │          │                  │          │              │
│  C code   ──┼── msg ──>│  index.js      ──┼── HTTP ─>│  API server  │
│             │          │                  │          │              │
│  <── msg ───┼──────────┤  <── response ───┼──────────┤              │
│             │          │                  │          │              │
│  AppMessage │          │  geolocation     │          │              │
│  request  ──┼── msg ──>│  → GPS lookup    │          │              │
│  <── msg ───┼──────────┤  → sends coords  │          │              │
└─────────────┘          └──────────────────┘          └──────────────┘
The flow for weather is:
- The watch sends an
AppMessageto the phone requesting weather. - PKJS uses
navigator.geolocationto get GPS coordinates. - PKJS makes an HTTP request to a weather API.
- PKJS sends the result back to the watch via
AppMessage. - The watch receives the message and updates the display.
All communication between watch and phone uses AppMessage - a key-value
dictionary system. You define the keys in package.json and they become
constants in both C and JS.
Preparing the Layout
We need a new TextLayer for the weather data. Add the declaration at the top
of the file:
static TextLayer *s_weather_layer;
Create it in main_window_load(). We place it at the bottom of the screen so
it stays out of the way of the centered time and date block:
// Create weather TextLayer - aligned to the bottom of the screen
int weather_y = bounds.size.h - PBL_IF_ROUND_ELSE(40, 30);
s_weather_layer = text_layer_create(
    GRect(0, weather_y, bounds.size.w, 25));
text_layer_set_background_color(s_weather_layer, GColorClear);
text_layer_set_text_color(s_weather_layer, GColorWhite);
text_layer_set_font(s_weather_layer, fonts_get_system_font(FONT_KEY_GOTHIC_18));
text_layer_set_text_alignment(s_weather_layer, GTextAlignmentCenter);
text_layer_set_text(s_weather_layer, "Loading...");
Add it as a child layer and destroy it in main_window_unload():
// In main_window_load()
layer_add_child(window_layer, text_layer_get_layer(s_weather_layer));

// In main_window_unload()
text_layer_destroy(s_weather_layer);
Setting Up AppMessage
AppMessage is the communication channel between the watch and phone.
Messages are key-value dictionaries.
In CloudPebble, go to Settings on the left sidebar. Check Uses
Location to allow the phone to access GPS. Then scroll down to PebbleKit JS
Message Keys and add the following keys: TEMPERATURE, CONDITIONS, and
REQUEST_WEATHER.
First, define the message keys in package.json. Add these to the pebble
section:
"capabilities": [
  "location"
],
"messageKeys": [
  "TEMPERATURE",
  "CONDITIONS",
  "REQUEST_WEATHER"
]
The location capability allows the phone to access GPS.
The message keys
become MESSAGE_KEY_TEMPERATURE, MESSAGE_KEY_CONDITIONS, and
MESSAGE_KEY_REQUEST_WEATHER constants in C.
Now create the AppMessage callbacks in your C file. These go above init():
static void inbox_received_callback(DictionaryIterator *iterator, void *context) {

}

static void inbox_dropped_callback(AppMessageResult reason, void *context) {
  APP_LOG(APP_LOG_LEVEL_ERROR, "Message dropped!");
}

static void outbox_failed_callback(DictionaryIterator *iterator, AppMessageResult reason, void *context) {
  APP_LOG(APP_LOG_LEVEL_ERROR, "Outbox send failed!");
}

static void outbox_sent_callback(DictionaryIterator *iterator, void *context) {
  APP_LOG(APP_LOG_LEVEL_INFO, "Outbox send success!");
}
Register the callbacks and open AppMessage in init(). It is important to
register callbacks before opening AppMessage so no messages are missed:
// Register AppMessage callbacks
app_message_register_inbox_received(inbox_received_callback);
app_message_register_inbox_dropped(inbox_dropped_callback);
app_message_register_outbox_failed(outbox_failed_callback);
app_message_register_outbox_sent(outbox_sent_callback);

// Open AppMessage
const int inbox_size = 128;
const int outbox_size = 128;
app_message_open(inbox_size, outbox_size);
Writing the JavaScript
Click Add New next to Source Files in the left sidebar, select
JavaScript file, and name it (e.g., weather.js). This code runs on the
phone whenever the watchface is open.
Create a new file at src/pkjs/index.js. This code runs on the phone whenever
the watchface is open.
Start with a helper function for making HTTP requests:
var xhrRequest = function (url, type, callback) {
  var xhr = new XMLHttpRequest();
  xhr.onload = function () {
    callback(this.responseText);
  };
  xhr.open(type, url);
  xhr.send();
};
Next, a function to convert Open-Meteo weather codes to readable strings:
function weatherCodeToCondition(code) {
  if (code === 0) return 'Clear';
  if (code <= 3) return 'Cloudy';
  if (code <= 48) return 'Fog';
  if (code <= 55) return 'Drizzle';
  if (code <= 57) return 'Fz. Drizzle';
  if (code <= 65) return 'Rain';
  if (code <= 67) return 'Fz. Rain';
  if (code <= 75) return 'Snow';
  if (code <= 77) return 'Snow Grains';
  if (code <= 82) return 'Showers';
  if (code <= 86) return 'Snow Shwrs';
  if (code === 95) return 'T-Storm';
  if (code <= 99) return 'T-Storm';
  return 'Unknown';
}
Now the weather fetching logic. We first get the user's location, then call the Open-Meteo API with those coordinates:
function locationSuccess(pos) {
var url = 'https://api.open-meteo.com/v1/forecast?' +
'latitude=' + pos.coords.latitude +
'&longitude=' + pos.coords.longitude +
'¤t=temperature_2m,weather_code';
xhrRequest(url, 'GET',
function(responseText) {
var json = JSON.parse(responseText);
var temperature = Math.round(json.current.temperature_2m);
var conditions = weatherCodeToCondition(json.current.weather_code);
var dictionary = {
'TEMPERATURE': temperature,
'CONDITIONS': conditions
};
Pebble.sendAppMessage(dictionary,
function(e) { console.log('Weather info sent!'); },
function(e) { console.log('Error sending weather info!'); }
);
}
);
}
function locationError(err) {
console.log('Error requesting location!');
}
function getWeather() {
navigator.geolocation.getCurrentPosition(
locationSuccess,
locationError,
{ timeout: 15000, maximumAge: 60000 }
);
}
Why Open-Meteo? Unlike many weather APIs, Open-Meteo is completely free and requires no API key. The URL is simple and the response is clean JSON.
Finally, set up the event listeners:
Pebble.addEventListener('ready',
  function(e) {
    console.log('PebbleKit JS ready!');
    getWeather();
  }
);

Pebble.addEventListener('appmessage',
  function(e) {
    console.log('AppMessage received!');
    if (e.payload['REQUEST_WEATHER']) {
      getWeather();
    }
  }
);
When the JS environment starts (ready), we fetch weather immediately. The
appmessage listener checks for the REQUEST_WEATHER key before refreshing,
so it only fetches weather when the watch explicitly asks for it.
Processing Weather Data on the Watch
Back in the C file, fill in inbox_received_callback() to extract the weather
data and display it:
static void inbox_received_callback(DictionaryIterator *iterator, void *context) {
  Tuple *temp_tuple = dict_find(iterator, MESSAGE_KEY_TEMPERATURE);
  Tuple *conditions_tuple = dict_find(iterator, MESSAGE_KEY_CONDITIONS);

  if (temp_tuple && conditions_tuple) {
    static char temperature_buffer[8];
    static char conditions_buffer[32];
    static char weather_layer_buffer[32];

    snprintf(temperature_buffer, sizeof(temperature_buffer), "%d°C", (int)temp_tuple->value->int32);
    snprintf(conditions_buffer, sizeof(conditions_buffer), "%s", conditions_tuple->value->cstring);
    snprintf(weather_layer_buffer, sizeof(weather_layer_buffer), "%s %s", temperature_buffer, conditions_buffer);
    text_layer_set_text(s_weather_layer, weather_layer_buffer);
  }
}
We use dict_find() to look up each key. Numbers arrive as int32, strings
as cstring.
Automatic Refresh
To keep the weather current, trigger a refresh every 30 minutes from the tick handler:
static void tick_handler(struct tm *tick_time, TimeUnits units_changed) {
  update_time();

  // Get weather update every 30 minutes
  if (tick_time->tm_min % 30 == 0) {
    DictionaryIterator *iter;
    app_message_outbox_begin(&iter);
    dict_write_uint8(iter, MESSAGE_KEY_REQUEST_WEATHER, 1);
    app_message_outbox_send();
  }
}
This sends an AppMessage with the REQUEST_WEATHER key to the phone. The JS
appmessage listener sees this key and calls getWeather().
Conclusion
In this part we learned how to:
- Set up
AppMessagefor watch-phone communication. - Write PebbleKit JS to run on the phone.
- Use
navigator.geolocationto get the user's location. - Fetch data from a web API using
XMLHttpRequest. - Parse a JSON response and send data to the watch.
- Display received data in a
TextLayer. - Set up automatic refresh via the tick handler.
Your watchface now shows live weather data! Check your code against the source for this part.
What's Next?
In the next part we will add Timeline Peek support, so the watchface adapts gracefully when the system overlays part of the screen.