Customizing Your Watchface
This page contains some instructions that are different if you're using CloudPebble or if you're using the SDK locally on your computer.
Select whether you're using CloudPebble or the SDK below to show the relevant instructions!
 Showing instructions for CloudPebble. Not using CloudPebble?
 Showing instructions for the SDK. Using CloudPebble?
In the previous part we created a basic watchface that displays the time and date using system fonts. It works, but it looks like every other watchface out there. Let's fix that by adding a custom font.
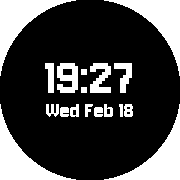
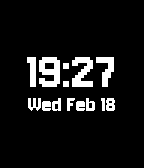
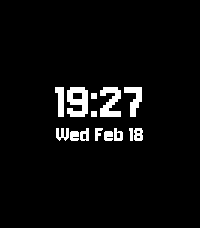
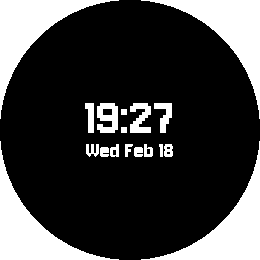
By the end of this part, your watchface will look something like this:
aplite
basalt
chalk
diorite
emery
gabbro


How Resources Work
App resources - fonts, images, and other data files - are managed through the Resources section in the left sidebar. Click Add New next to Resources to upload files and configure their type and identifier.
App resources - fonts, images, and other data files - are managed through the
media array in package.json. Each entry specifies the resource type, a name
to reference it in code, and the path to the file.
All resource files must be placed inside the resources/ directory of your
project.
Adding a Custom Font
A custom font must be a TrueType font
in the .ttf file format. For this tutorial we will use
Jersey 10 from Google Fonts, but
you can use any .ttf font you like.
In CloudPebble, click Add New next to Resources in the left sidebar.
Upload your .ttf font file, set the Resource Type to TrueType Font,
and set the Identifier to FONT_JERSEY_56. Then add the same font file
again with the identifier FONT_JERSEY_24. We register the same font twice at
different sizes - one large size for the time, and a smaller one for the date.
Place your font file in resources/fonts/ and add entries to the media array
in package.json. We will register the same font twice at different sizes -
one large size for the time, and a smaller one for the date:
"resources": {
  "media": [
    {
      "type": "font",
      "name": "FONT_JERSEY_56",
      "file": "fonts/Jersey10-Regular.ttf",
      "compatibility": "2.7"
    },
    {
      "type": "font",
      "name": "FONT_JERSEY_24",
      "file": "fonts/Jersey10-Regular.ttf",
      "compatibility": "2.7"
    }
  ]
}
The name field becomes a constant you can reference in C code, prefixed with
RESOURCE_ID_. The number at the end of the name (56, 24) is just part of the
name you chose - it serves as a reminder of the intended font size.
Loading Custom Fonts in C
Back in main.c, declare two GFont variables at the top of the file to
hold our loaded fonts:
static GFont s_time_font;
static GFont s_date_font;
Load them in main_window_load() using fonts_load_custom_font() and
resource_get_handle():
// Load custom fonts
s_time_font = fonts_load_custom_font(resource_get_handle(RESOURCE_ID_FONT_JERSEY_56));
s_date_font = fonts_load_custom_font(resource_get_handle(RESOURCE_ID_FONT_JERSEY_24));
Centering the Layout
While we're here, let's properly center the time and date on screen. The date starts 56 pixels below the time and its layer is 30 pixels tall, giving us a total block height. We center the block by subtracting half its height from the screen center:
// Center the time + date block vertically
int date_height = 30;
int block_height = 56 + date_height;
int time_y = (bounds.size.h / 2) - (block_height / 2) - 10;
int date_y = time_y + 56;
Notice the - 10 offset at the end of the time_y calculation. Custom fonts
often include internal padding (ascent space above the tallest glyph) that
shifts the rendered text lower than the calculated position. Subtracting a small
offset compensates for this and keeps the block visually centered on screen. You
may need to adjust this value depending on the font you choose.
Use time_y and date_y in the text_layer_create() calls instead of the
old PBL_IF_ROUND_ELSE() values:
s_time_layer = text_layer_create(
    GRect(0, time_y, bounds.size.w, 60));
Now replace the system font calls with our custom fonts. Change the
text_layer_set_font() calls for both layers:
// For the time layer (was FONT_KEY_BITHAM_42_BOLD)
text_layer_set_font(s_time_layer, s_time_font);

// For the date layer (was FONT_KEY_GOTHIC_24_BOLD)
text_layer_set_font(s_date_layer, s_date_font);
Cleaning Up
Custom fonts must be unloaded when no longer needed. Add the cleanup calls to
main_window_unload(), after destroying the TextLayers:
// Unload custom fonts
fonts_unload_custom_font(s_time_font);
fonts_unload_custom_font(s_date_font);
Always destroy layers before unloading the fonts they use. The layer may try to access the font during destruction.
Click the play button to compile and install. You should see your watchface now uses the custom font, giving it a much more distinctive look.
Compile and install with pebble build && pebble install. You should see your
watchface now uses the custom font, giving it a much more distinctive look.
Experimenting
Here are some things you can try:
- Use a different font file. There are many free
.ttffonts available online at sites like dafont.com and Google Fonts. - Adjust the font sizes by changing the
namevalues inpackage.json. - Try different Y-positions in
text_layer_create()to adjust the layout.
Tip: Not all fonts render well at small sizes on the Pebble display. Pixel-style and bitmap fonts tend to look the sharpest.
Conclusion
In this part we learned how to:
- Register font resources in
package.json. - Load custom fonts with
fonts_load_custom_font()andresource_get_handle(). - Apply fonts to
TextLayers. - Clean up font resources properly.
Your watchface now has a unique visual identity. Check your code against the source for this part if you run into any issues.
What's Next?
In the next part we will add a battery meter and Bluetooth disconnect alerts to give users useful information at a glance.