Adding Weather with Open-Meteo
This page contains some instructions that are different if you're using CloudPebble or if you're using the SDK locally on your computer.
Select whether you're using CloudPebble or the SDK below to show the relevant instructions!
 Showing instructions for CloudPebble. Not using CloudPebble?
 Showing instructions for the SDK. Using CloudPebble?
Up until now, everything in our watchface has been running entirely on the watch. In this part we take a big step: communicating with the phone to fetch live weather data from the web.
We will use the Location sensor to get the user's GPS coordinates, then the
standard fetch() API to get weather data from the free
Open-Meteo API (no API key needed!).
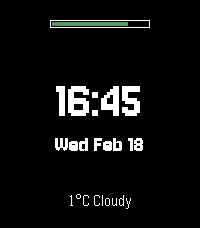
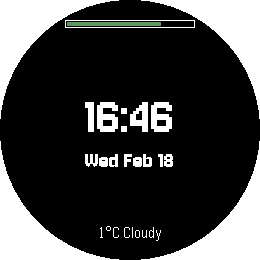
By the end, our watchface will show the current temperature and weather conditions:
emery
gabbro
This section continues from Part 3.
How Networking Works in Alloy
Alloy apps make HTTP requests using the fetch() API. Requests are proxied
through PebbleKit JS (PKJS) running on the phone. This means you need:
- The
@moddable/pebbleproxypackage installed - A phone connected to your Pebble with internet access
┌─────────────┐          ┌──────────────────┐          ┌──────────────┐
│   Watch     │          │  Phone (PKJS)    │          │   Internet   │
│             │          │                  │          │              │
│  fetch()  ──┼── msg ──>│  pebbleproxy   ──┼── HTTP ─>│  API server  │
│             │          │                  │          │              │
│  <── msg ───┼──────────┤  <── response ───┼──────────┤              │
│             │          │                  │          │              │
│  Location ──┼── msg ──>│  → GPS lookup    │          │              │
│  sensor     │          │  → sends coords  │          │              │
│  <── msg ───┼──────────┤  back to watch   │          │              │
└─────────────┘          └──────────────────┘          └──────────────┘
Setting Up the Network Proxy
In CloudPebble, go to the Packages section in the left sidebar and add
@moddable/pebbleproxy.
Install the @moddable/pebbleproxy package:
$ pebble package install @moddable/pebbleproxy
Click Add New next to Source Files, select JavaScript file, and
name it index.js. Set up the proxy:
Create (or update) src/pkjs/index.js to set up the proxy:
const moddableProxy = require("@moddable/pebbleproxy");
Pebble.addEventListener('ready', moddableProxy.readyReceived);
Pebble.addEventListener('appmessage', moddableProxy.appMessageReceived);
That's it! The proxy handles forwarding fetch() requests and Location sensor
data between the watch and phone. No custom location code is needed in PKJS.
Adding the Location Capability
In CloudPebble, go to Settings and check Uses Location so the phone is allowed to access GPS.
Add the location capability to package.json so the phone is allowed to
access GPS:
"capabilities": [
  "location"
]
Preparing the Layout
We need a weather display at the bottom of the screen. Add a weather variable
near the top of main.js:
let weather = null;
In drawScreen(), add the weather display after the date, before
render.end():
    // Draw weather at bottom
    const weatherY = render.height - smallFont.height -
        (render.height < 180 ? 6 : 20);
    if (weather) {
        const weatherStr = `${weather.temp}°C ${weather.conditions}`;
        width = render.getTextWidth(weatherStr, smallFont);
        render.drawText(weatherStr, smallFont, white,
            (render.width - width) / 2, weatherY);
    } else {
        const msg = "Loading...";
        width = render.getTextWidth(msg, smallFont);
        render.drawText(msg, smallFont, white,
            (render.width - width) / 2, weatherY);
    }
Getting the User's Location
Alloy provides a Location sensor that follows the same ECMA-419 pattern as
the Battery sensor we used in Part 3. Import it at the top of main.js:
import Location from "embedded:sensor/Location";
Create a requestLocation() function that opens a Location sensor. The
onSample callback fires once the phone has obtained the GPS coordinates:
let location = null;

function requestLocation() {
    location = new Location({
        onSample() {
            const sample = this.sample();
            console.log("Got location: " + sample.latitude + ", " + sample.longitude);
            this.close();
            fetchWeather(sample.latitude, sample.longitude);
        }
    });
}
A few important things to note:
this.close()- unlike Battery, we close the Location sensor after getting the first reading. Location is a one-shot request, not a continuous monitor. We wrap it in a function so we can request a fresh location each time we want to refresh the weather.- Coordinates come as floats -
sample.latitudeandsample.longitudeare standard decimal degree values (e.g.,37.7749,-122.4194). No need to multiply or divide by 10000 like in the C tutorial. - The proxy handles everything - the
@moddable/pebbleproxypackage handles the phone-side GPS lookup automatically. You don't need any custom PKJS code for location.
Compare this to the C approach where you need custom PKJS code with
navigator.geolocation, sendAppMessage, integer coordinate encoding,
AppMessage handlers, and messageKeys in package.json. With the Location
sensor, it's just a few lines.
Fetching Weather Data
Add a function to convert Open-Meteo weather codes:
function getWeatherDescription(code) {
    if (code === 0) return "Clear";
    if (code <= 3) return "Cloudy";
    if (code <= 48) return "Fog";
    if (code <= 55) return "Drizzle";
    if (code <= 57) return "Fz. Drizzle";
    if (code <= 65) return "Rain";
    if (code <= 67) return "Fz. Rain";
    if (code <= 75) return "Snow";
    if (code <= 77) return "Snow Grains";
    if (code <= 82) return "Showers";
    if (code <= 86) return "Snow Shwrs";
    if (code === 95) return "T-Storm";
    if (code <= 99) return "T-Storm";
    return "Unknown";
}
Now the fetch function itself. Notice it takes latitude and longitude as
parameters - the Location sensor passes them directly:
async function fetchWeather(latitude, longitude) {
    try {
        const url = new URL("http://api.open-meteo.com/v1/forecast");
        url.search = new URLSearchParams({
            latitude,
            longitude,
            current: "temperature_2m,weather_code"
        });

        console.log("Fetching weather...");
        const response = await fetch(url);
        const data = await response.json();

        weather = {
            temp: Math.round(data.current.temperature_2m),
            conditions: getWeatherDescription(data.current.weather_code)
        };

        console.log("Weather: " + weather.temp + "C, " + weather.conditions);
        drawScreen();

    } catch (e) {
        console.log("Weather fetch error: " + e);
    }
}
Why Open-Meteo? Unlike many weather APIs, Open-Meteo is completely free and requires no API key. The URL is simple and the response is clean JSON.
Notice how clean this is compared to the C approach: no XMLHttpRequest, no
manual JSON parsing callbacks. Alloy's fetch() with async/await makes
the code straightforward.
Automatic Refresh
To keep the weather current, trigger a refresh every hour using the
hourchange event. This calls requestLocation(), which creates a new
Location instance, gets fresh GPS coordinates, and chains into a weather
fetch:
watch.addEventListener("hourchange", requestLocation);
Like minutechange, the hourchange event fires immediately when
registered, so this also triggers the initial weather fetch at startup.
Conclusion
In this part we learned how to:
- Set up the
@moddable/pebbleproxypackage for network access. - Use the
Locationsensor to get GPS coordinates from the phone. - Use
fetch()withasync/awaitto call a web API. - Parse the Open-Meteo JSON response.
- Display weather data on the watchface.
- Set up automatic refresh via a time event.
Your watchface now shows live weather data! Check your code against the source for this part.
What's Next?
In the next part we will add support for Timeline Quick View - adapting the layout when the screen is partially obstructed.