Your First Watchface
This page contains some instructions that are different if you're using CloudPebble or if you're using the SDK locally on your computer.
Select whether you're using CloudPebble or the SDK below to show the relevant instructions!
 Showing instructions for CloudPebble. Not using CloudPebble?
 Showing instructions for the SDK. Using CloudPebble?
The complete source code for this tutorial is available on GitHub.
In this tutorial series we will build a fully-featured digital watchface from scratch using Alloy, Pebble's modern JavaScript framework. By the end you will have a watchface with weather support, user settings, and more. But first, we need to start with the basics.
Platform Support: Alloy currently supports Emery (Pebble Time 2) and Gabbro (Pebble Round 2).
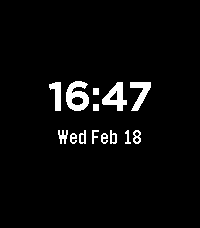
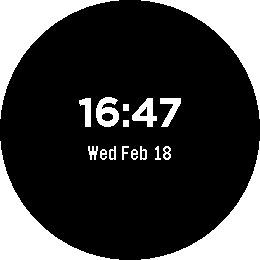
When we are done with this first part, you should have a working watchface that displays the time and date on a black background:
emery
gabbro
Creating a New Project
Go to CloudPebble and click Create to start a new project. Choose Alloy as the project type and name it "watchface". Then go to Settings on the left and set App Kind to Watchface.
Before we begin, make sure you have the Pebble SDK installed. If you haven't done this yet, head over to the download page to get set up.
Once you are ready, navigate to a directory of your choosing and create a new Alloy project:
$ pebble new-project --alloy watchface
The most important file is main.js - this is where your watchface code
runs on the watch.
This creates a new folder with the basic structure for an Alloy app. The most
important file is src/embeddedjs/main.js - this is where your watchface code
runs on the watch. (See the
Getting Started guide for more details on
project structure.)
Open package.json and make sure the watchapp object indicates this is a
watchface:
"watchapp": {
  "watchface": true
}
The key difference between a watchface and a watchapp is that watchfaces serve as the default display on the watch. The Up and Down buttons are reserved for the Pebble timeline, so they are not available for custom behavior.
Understanding Alloy Watchfaces
Every Alloy watchface follows the same basic pattern:
- Import Poco for graphics rendering
- Create a renderer from the
screenglobal - Set up fonts and colors once at startup
- Register a time event that redraws the display
Open main.js in the CloudPebble editor and replace its contents with:
Open src/embeddedjs/main.js and replace its contents with:
import Poco from "commodetto/Poco";

const render = new Poco(screen);
Poco is a low-level graphics library for drawing on the screen. The screen
global provides access to the Pebble display.
Setting Up Fonts and Colors
Before we can draw anything, we need a font and some colors. Add these below the renderer:
// Fonts
const timeFont = new render.Font("Bitham-Bold", 42);
const dateFont = new render.Font("Gothic-Bold", 24);

// Colors
const black = render.makeColor(0, 0, 0);
const white = render.makeColor(255, 255, 255);
Alloy comes with several built-in Pebble fonts. Bitham-Bold at 42px is a
good size for a time display - bold and easy to read at a glance.
makeColor() takes RGB values (0–255) and returns a color value optimized for
the display.
Displaying the Time
Now let's write a draw function. All Poco drawing happens between begin() and
end() calls:
function draw(event) {
    const now = event.date;

    render.begin();
    render.fillRectangle(black, 0, 0, render.width, render.height);

    // Format time as HH:MM
    const hours = String(now.getHours()).padStart(2, "0");
    const minutes = String(now.getMinutes()).padStart(2, "0");
    const timeStr = `${hours}:${minutes}`;

    // Center the time on screen
    let width = render.getTextWidth(timeStr, timeFont);
    render.drawText(timeStr, timeFont, white,
        (render.width - width) / 2,
        (render.height / 2) - timeFont.height + 5);

    render.end();
}
The event parameter contains a date property with the current Date
object - no need to call new Date() yourself. We use padStart() to ensure
single-digit hours and minutes are zero-padded (e.g., "09:05" instead of
"9:5").
getTextWidth() measures how many pixels wide the rendered text will be, which
lets us center it horizontally.
Now register the draw function for time updates:
watch.addEventListener("minutechange", draw);
minutechange fires once every minute. The callback is also invoked
immediately when the event listener is registered, so the watchface draws right
away without needing a separate startup call. You could use secondchange for
a seconds display, but that costs extra battery.
Click the play button to compile and install - you should now see the current time!
Build and install - you should now see the current time!
$ pebble build
$ pebble install --emulator emery
Adding the Date
Let's add a date display below the time. We need day and month name arrays
since JavaScript's Date only provides numeric values:
const DAYS = ["Sun", "Mon", "Tue", "Wed", "Thu", "Fri", "Sat"];
const MONTHS = ["Jan", "Feb", "Mar", "Apr", "May", "Jun",
                "Jul", "Aug", "Sep", "Oct", "Nov", "Dec"];
Now update the draw() function to include the date. Add this after the time
drawing, before render.end():
    // Format date as "Mon Jan 01"
    const dayName = DAYS[now.getDay()];
    const monthName = MONTHS[now.getMonth()];
    const dateStr = `${dayName} ${monthName} ${String(now.getDate()).padStart(2, "0")}`;

    // Draw date below the time
    width = render.getTextWidth(dateStr, dateFont);
    render.drawText(dateStr, dateFont, white,
        (render.width - width) / 2,
        (render.height / 2) + 10);
Build and install. You should now see both the time and date.
Conclusion
That is the basic process for creating a Pebble watchface with Alloy! To recap, we:
- Created a new Alloy project configured as a watchface.
- Imported Poco and created a renderer.
- Set up fonts and colors.
- Drew the time centered on screen.
- Registered a
minutechangeevent listener to keep the display updated. - Added a date display.
If you have problems with your code, check it against the source code for this part.
What's Next?
The design is functional but plain. In the next part we will switch to a more distinctive font and properly center the layout.